Beginner Quilting Series: What's Next After You've Made a Quilt Top

Hi! We just finished up our On Point QAL with completing the top. The QAL was so much fun! I loved seeing everyone's versions and I was happy to complete a new one of my own. I started out making two and so far I have finished the top for one of them- the print version using Looking Forward by Jen Kingwell. I still have to finish up my solid gray version. The blocks are all completed, I just need to assemble. When you get a chance, pop over to the hashtag and check out all of the beautiful versions there- #onpointQAL
In case you missed the QAL and want to make this quilt now, here are all the links!
Week 1-Choosing Fabric- here
Week 2- Cutting the Fabric- here
Week 3- Make 8 blocks- here
Week 4- Make 8 blocks- here
Week 5- Make 9 blocks- here
Week 6- Assemble the top- here
So, now you have a quilt top :) If you never made a quilt or are still learning, you are probably wondering what you do next?? Well, I'll tell you!
The next step will be to prepare the 3 layers of a quilt for quilting.
What three layers, you may ask? Well, when you are making a quilt, you have a quilt top, the batting, and the backing.
1. Quilt top- we just made this during the QAL
2. Batting- there are lots and lots of batting options. I'll make a specific post on this one day. But, for now, short and sweet...you can choose the type of batting that you want to use in your quilt. Most commonly, there are:
-cotton/polyester blends- the cheapest option, warm, soft, and lighter in weight
than pure cotton
-100% cotton- very common, pretty good price, warm, slightly stiff when first quilted but will soft after use. You'll need to watch out for cotton seeds that can stain your fabric.
-wool- expensive, so soft and so fluffy, really warm, one thing to watch for is that wool can work its way through the top and back of your quilt and shed that way (called Bearding)- really make sure you read the package instructions and follow their recommendations
-bamboo- expensive, so soft with the best drape ever
My favorite cotton batting to use is from The Warm Company. If I'm working with something really light/white, I use Warm & White. Otherwise I use Warm & Natural. But, recently, I tried one of their new battings- Warm & Plush. Oh my goodness! New favorite! Its twice as heavy as the Warm & Natural so its perfect for me because I like my quilts warm and heavy. It quilts up beautifully and it so nice to work with. I have both hand quilted and machine quilted with it and got excellent results for both. You have to try it!!
I also use wool and bamboo but not as often as cotton.
If you don't know where to start, just pick one. Try it, see what you think and then experiment with others as you make more tops. You'll find your own favorite.
3. Backing- this is the fabric that you use to make up the back of the quilt. Here is what you need to know about quilt backing. Like we talked about in our Beginner Quilting Series- Fabric post, generally, standard quilting cotton has a width of 43/44". So, if your quilt is bigger than 43/44" wide (the On Point quilt is about 69" wide), you are going to need to sew two pieces of backing fabric together to get a piece of fabric that is wide enough to cover the back of the quilt (that's called piecing a backing). I'll go into more detail about piecing a backing a little later.
If you don't want to piece a backing, you can buy wide back fabric that measures 108" wide! Wide Back fabric makes it so easy because to get your backing ready, all you need to do is trim your fabric to roughly the size you need- no sewing required. Just to be clear, you order this the same way you order standard fabric, by the yard. So if you order 1 yard, you'll get a piece of fabric that measures 36" x 108". Two yards would be 72" x 108". Three yards would be 108" x 108"- which is a really great simple thing to order if you are looking for a king size backing.
Let's talk a little more about piecing a backing. Say you are using standard quilting cotton and you want to make a backing, how do you do it?
Here is how I do it-
I lay out my quilt top. Then I fold the length of backing in half lengthwise. Here I have 5 yards folded in half and laid on top of the quilt top.

I arrange it so that the side that does not have the fold (it has the beginning and then end of the cut of fabric) at the top. I position it however many inches that I;d like it to be above. If I am quilting the quilt myself, I usually do about 3" above the quilt top. This just gives wiggle room when basting and quilting.

Then I come down to the bottom and I cut the same amount away from the fabric there too.

So, about 3" down from where the quilt top stops, I cut the backing. The extra portion there, I keep in my fabric stash.

Then you open up both lengths of the backing.

Put one on top of the other, right sides together and line up the selvedge edges.

Next, I sew about 1/4" away from the selvedge down the whole lengths of the fabric.
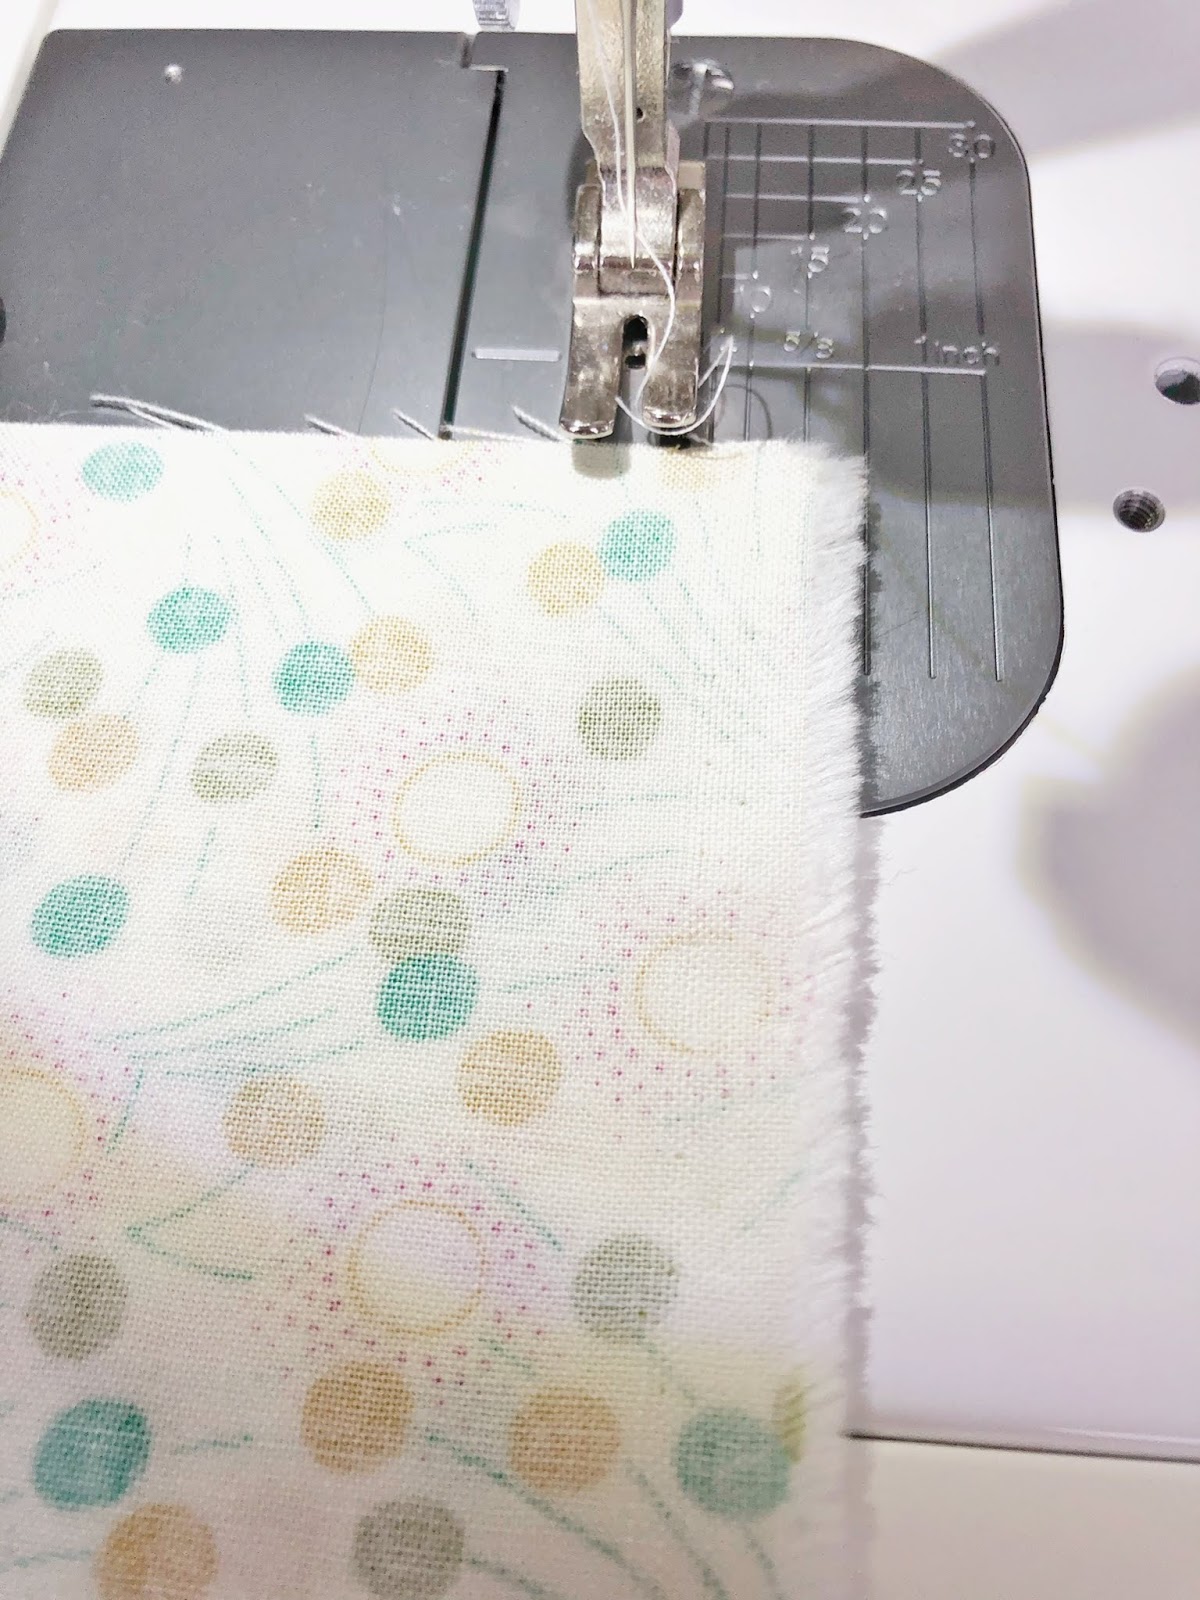

After I sew, I line my 1/4" line of the ruler up on my sewing line and trim away the selvedge.

Then press the middle seam. I tend to press to one side but you could press it open if you wanted as well.
Now, you have a completed top, whatever batting that you chose, and a pieced backing (or 108" wide backing if you chose that).
Stay tuned! Next, I'll be sharing how I baste a quilt.
You can subscribe to my blog to get notified of new posts if you'd like and you can follow me on Instagram here
You can share any posts related to this QAL by using the hashtags #onpointqal and #jessicadayonpatterns
Talk to you soon,
Jessica
Comments
Post a Comment