Week 1- Sweet Star Quilt Along: Choosing Fabric and Cutting
Hi, Everyone! Welcome to the Sweet Star Quilt Along which officially starts today!! I am really excited to make this quilt again (I’ve chosen Christmas colors) and to make it along side of you!
Before I get started with the information today...
-you can subscribe to my blog to get notified of new posts if you'd like and you can follow me on Instagram here
-you can share any posts related to this QAL by using the hashtags #sweetstarquilt and #jessicadayonpatterns
-I also just want to note that this QAL will be different from my last one (the On Point QAL) because the Sweet Star pattern has already been released. You can download the complete PDF below. As such, the blog posts during the QAL will serve as check in's, instead of tutorials for the actual pattern. If you come across any questions or problems, just let me know in the comments or on Instagram.
-here is the schedule we will be following--
Week 1 April 26- Choosing Fabric and Cutting
Week 2 May 3- Make 4 Blocks
Week 3 May 10- Make 4 Blocks
Week 4 May 17- Make 4 Blocks
Week 5 May 24- Make 4 Blocks
Week 6 May 31- Quilt Top Assembly
Week 2 May 3- Make 4 Blocks
Week 3 May 10- Make 4 Blocks
Week 4 May 17- Make 4 Blocks
Week 5 May 24- Make 4 Blocks
Week 6 May 31- Quilt Top Assembly
This week we just beginning at Week 1. We are choosing our fabric and doing all the cutting!
This pattern is no longer free and will be available for purchase in my shop soon.
This pattern is no longer free and will be available for purchase in my shop soon.
The Sweet Star Quilt measures 84" x 84". When I first made it, I used Garden Variety by Lella Boutique. I love how it turned out and how the colors play off of each other. But, this time, as I mentioned above, I am doing it in reds, greens, and low volumes.
This time around, I’ve chosen 8 reds, 8 greens, 4 red low volumes, and 4 green low volumes.
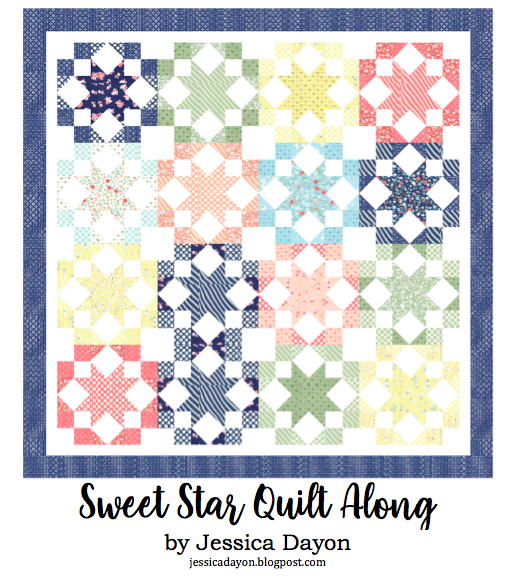
Here is the layout I’m planning on using (although these are not the fabrics I’m using). But, you can get an idea of fabric placement.
I want to let you know some other size options too!
The original quilt measures 84” x 84” and the finished block measurement is 18”.
If you want to make a smaller version, you have two options...
Throw size- 66” x 66”
This version, you’ll make 9 blocks (instead of 16) and you’ll arrange them in a 3 x 3 layout. The border widths stay the same as the original.
You can plan on making 3 blocks during Week 2 and 2 blocks per week during Weeks 3, 4, and 5.
Baby size- 48” x 48”
This version, you’ll make 4 blocks (instead of 16) and you’ll arrange them in a 2 x 2 layout. The border widths stay the same as the original.
You can plan on making 1 block per week during Weeks 2, 3, 4, and 5.
Once I have my fabric cut, I separate it all into 16 piles, 1 pile per block. The contains all of the pieces you need to make 1 block. This way, during the QAL, I’ll be able to just grab 4 piles each week and easily make 4 blocks. I find if you do all the sorting up front, then it’s easier and quicker for the rest of the weeks.
Let me know if you have any questions!
Talk to you soon,
Jessica


Comments
Post a Comment